
This led to the idea of using the laminated construction for the visual appeal of contrasting types of wood, even without the full-length rod.
| Hiking Staves | up ↑ |
I am uncomfortable walking without a stick in my hand.
Conventional walking sticks are too short for use on uneven terrain. Some extra length is needed, whether one is walking along a road with a sloping shoulder, going downhill on a mountain trail, probing marshy ground, or vaulting a small stream or ditch. I like a staff that reaches at least about to my armpit or shoulder. A good stick also needs to be strong enough knock vines and brambles out of the way, bear my full weight (200 lbs) vaulting a stream, and fending off agressive dogs or poisonous snakes.
A problem with a staff of such length is that they are not permitted to be carried onto airplanes. So, I looked around the web, seeking to buy a staff that can separate into sections that would fit into a carry-on sized suitcase.
The sturdiest commercial example I could find was the Brazos Traveler's Walking Stick. I was tempted to buy one, but the way the sections fasten together seemed to me to be inherently too weak to stand up under "whacking". That is, it seemed to me that the threaded inserts did not leave enough wood to prevent splitting under serious sideways flexion forces. Moreover, my experience with brass threaded fasteners is that they fracture easily.
Since I could not find anything I liked for sale, I decided to make one. To join the sections, I decided top combine an internal threaded rod (to pull the pieces together) with an external sleeve to resist sideways force. This led to a series of designs, which are described below.
I decided to use steel for the hardware connecting the pieces, because of bad experiences with brass in other threaded parts, like machine screws, breaking off. I have now tried various hardwares in 1/4-20, M5-8, and 10-24 threads. All worked nearly equally well. The 1/4-20 hardware is easier to find, but the two smaller sizes don't require drilling out as much wood, so I feel the result is stronger overall.
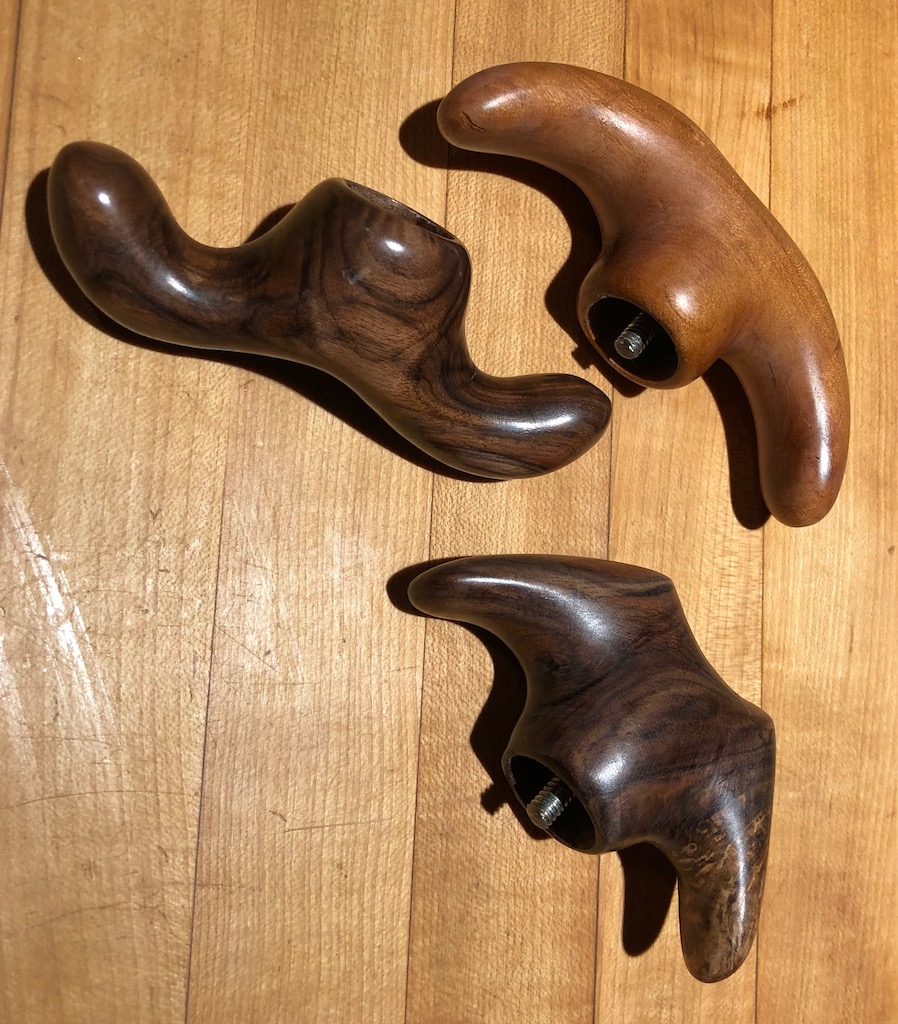
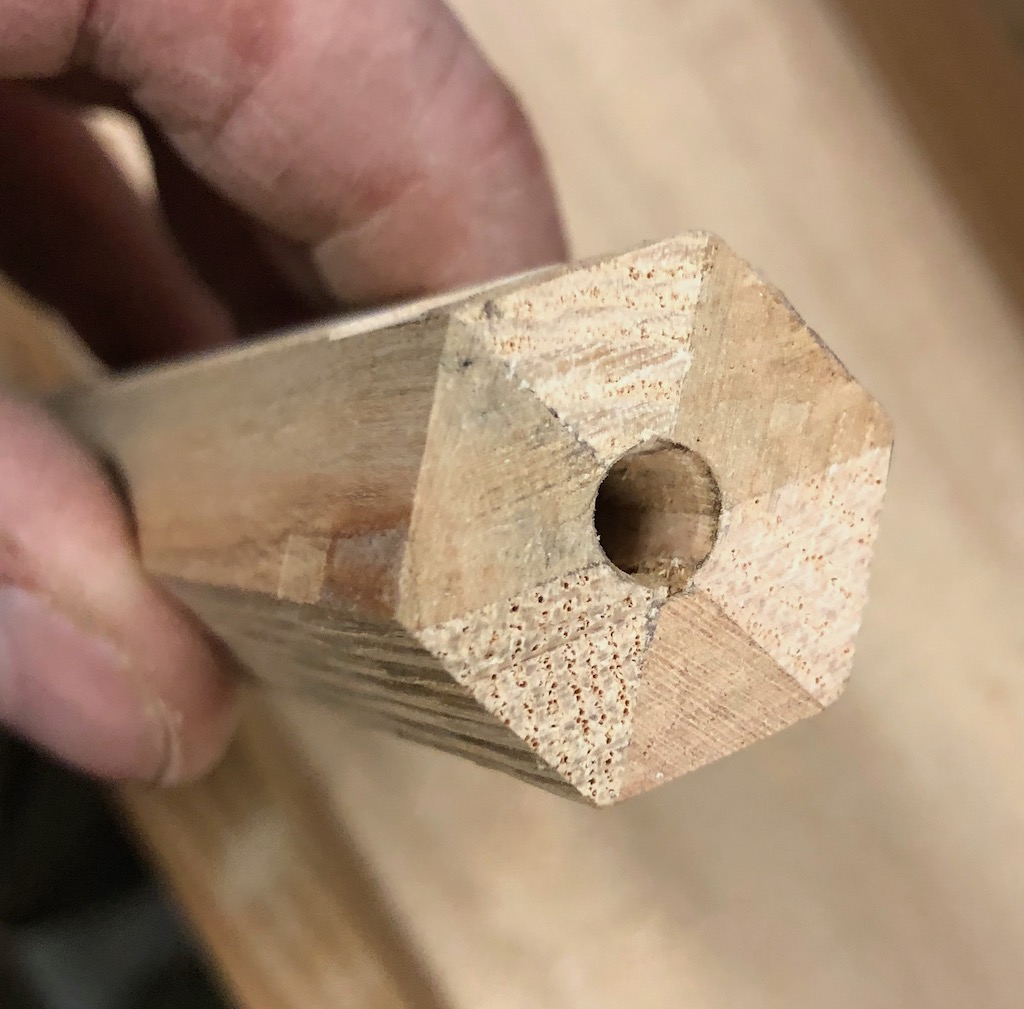
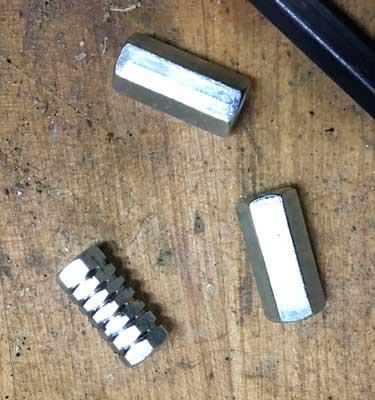
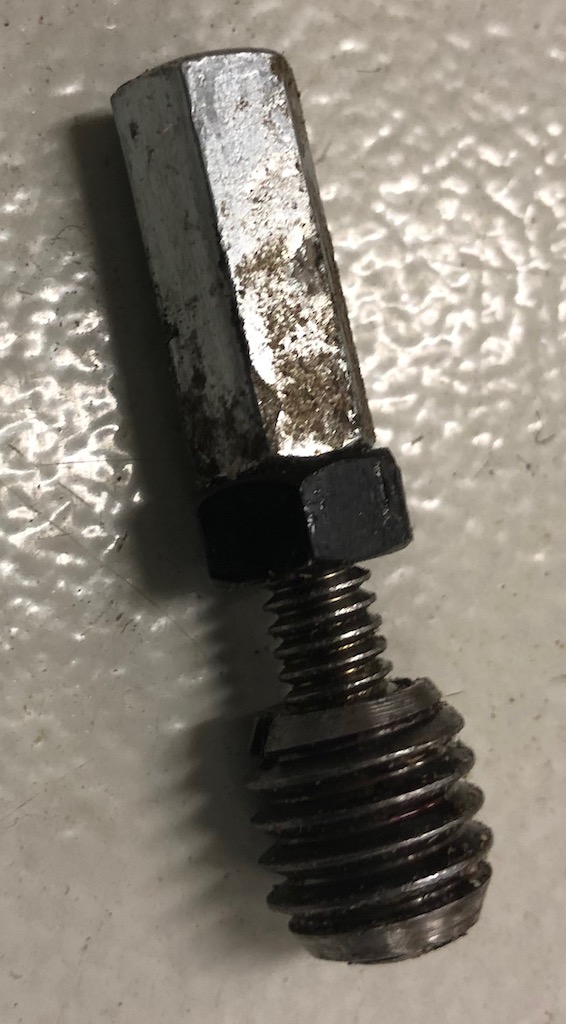
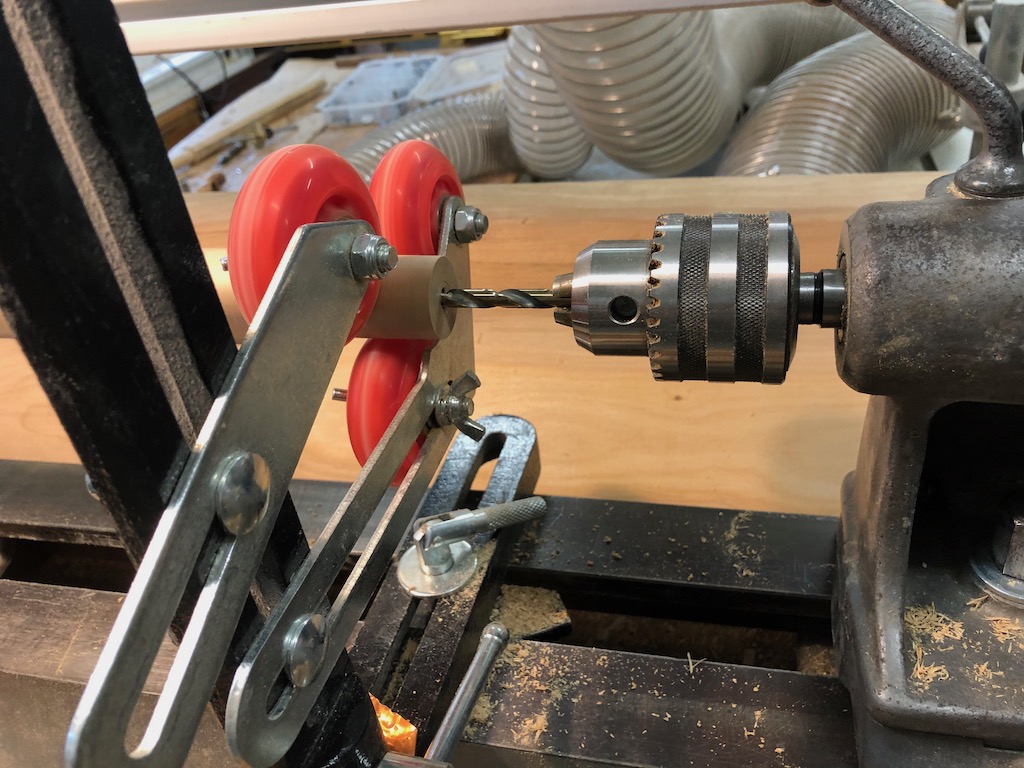
None of the female M5-8 or 10-24 threaded inserts I was able to find on the web seemed suitable. Most of them were too large in external diameter; so, drilling out the stick for the insert would weaken it too much. My solution was to cut glue-grabbing grooves in a hex connector-nut, as shown below.They work with an 11/32 inch bore.
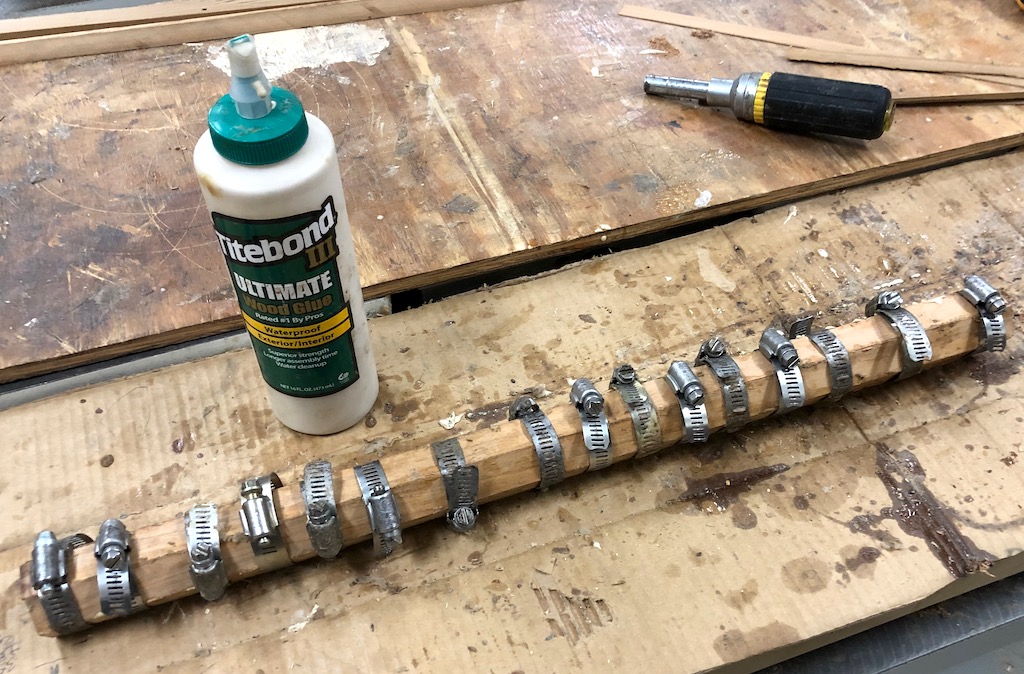
For the 1/4-20, I was able to find some decent screw-in inserts. They work with a 3/8 inch" bore. To avoid splitting as the inserts are screwed in and glued (with epoxy), I used hose clamps. The second photo shows a different insert, that requires a wider hole and provides less thread, but which worked OK for handles.

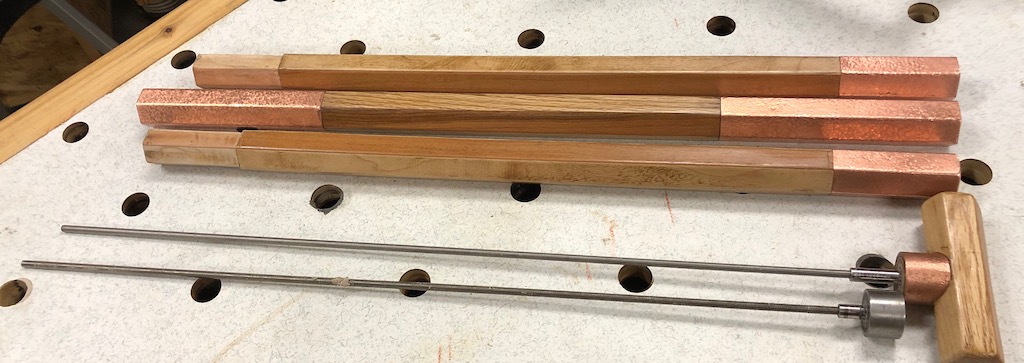
For external reinforcement around joints, some form of tubing is needed. The choice of tubing involves a trade-off between strength of the tube and strength of the wood. The thinner the walls the weaker the tube, but thicker tube walls leave less wood at the critical area near the end of the tube. I tried several types of tubing, including:
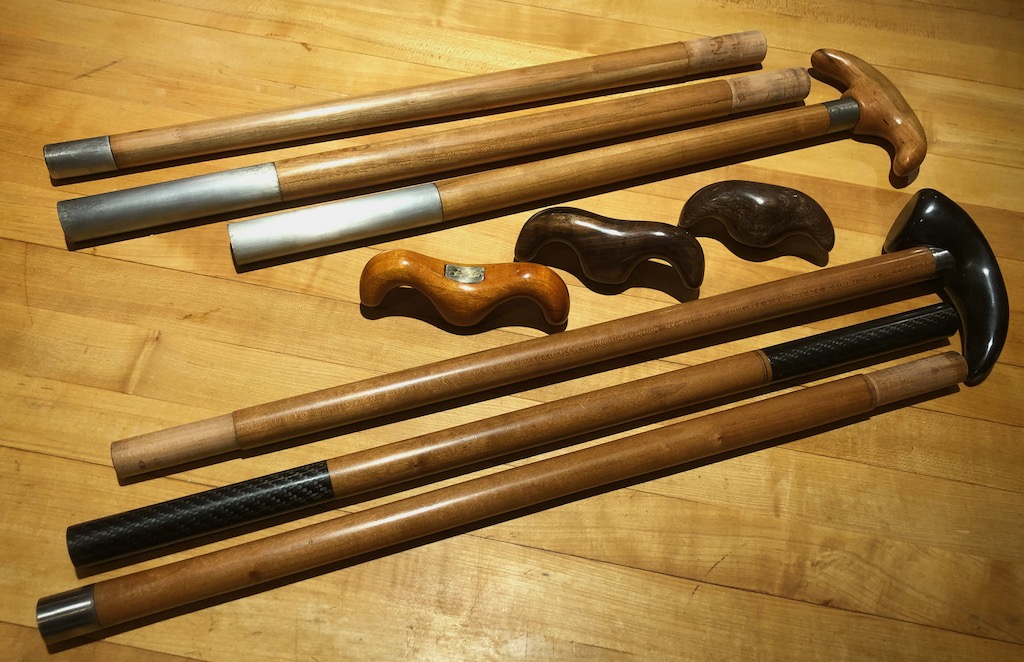
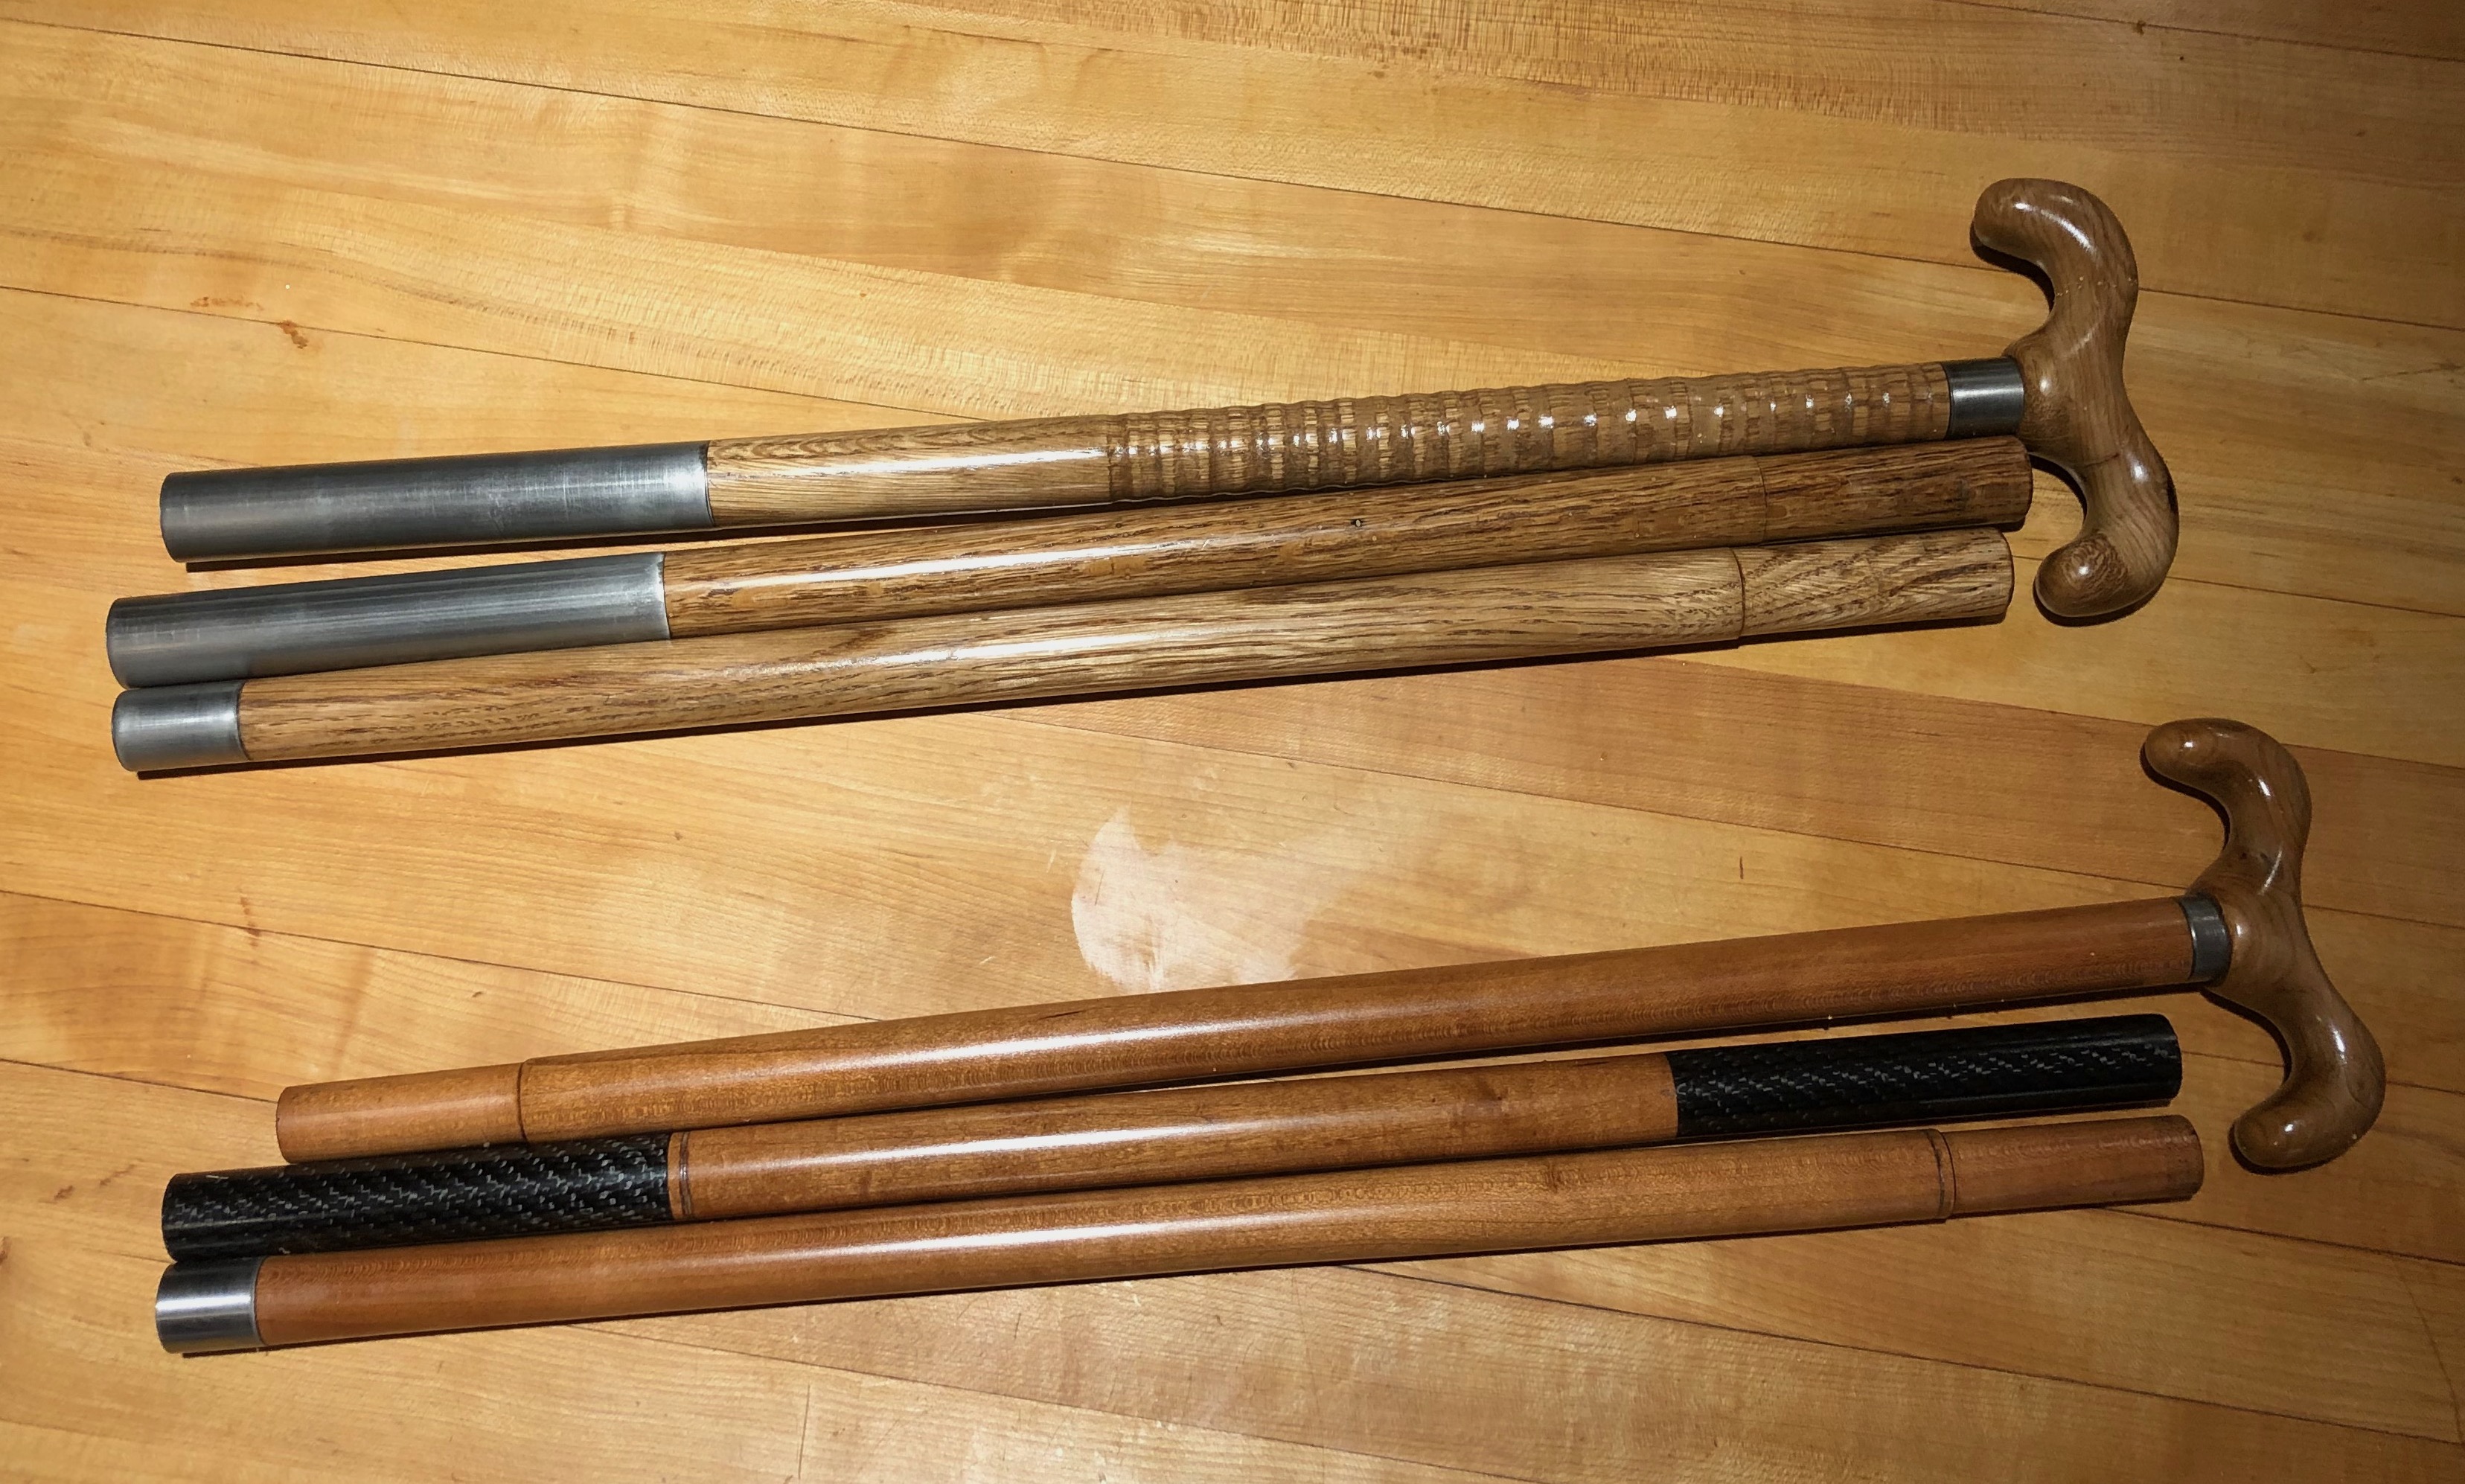
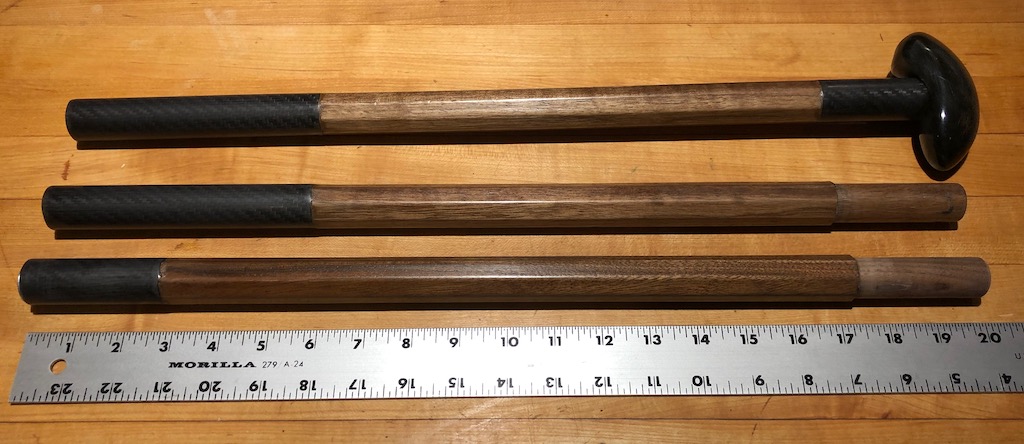
The first stick I made used the brass tubing.

The second used the carbon fiber composite tubing.
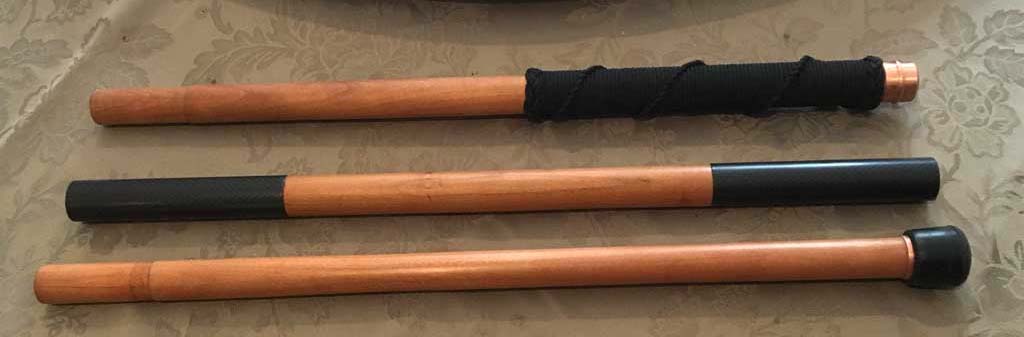
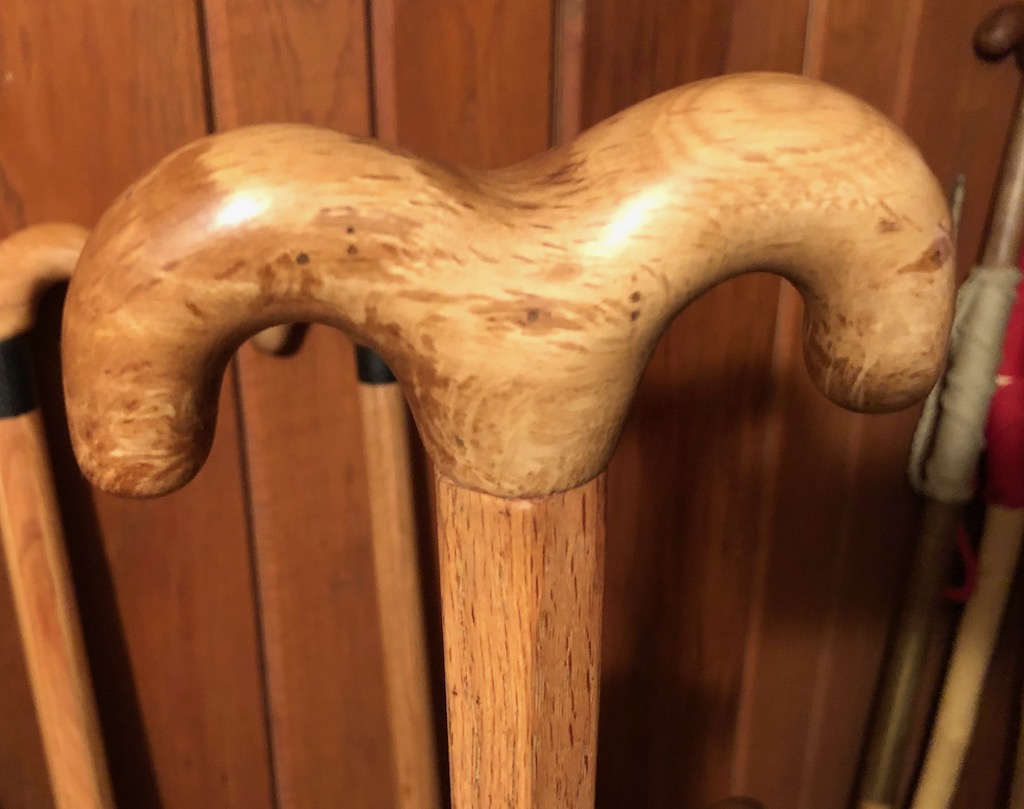
Here they are, assembled, alongside a one-piece 38-inch "pig-headed" stick I made from a cherry sapling. The brass is pretty, and is more resistant to side impact, but adds quite a bit of weight.
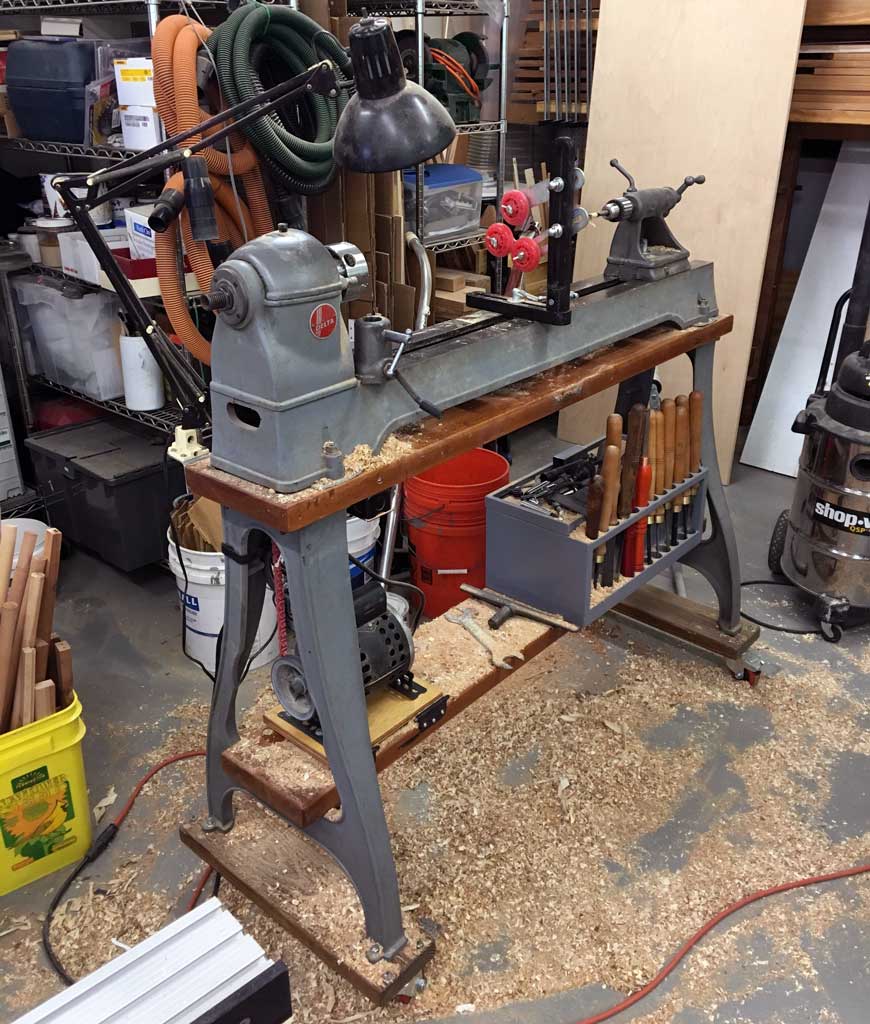
The pieces were turned, and holes bored for the threaded inserts, on my antique Delta 1460 lathe. The best result comes from roughing out the spindle enough to use the steady rest, drilling, gluing in the inserts, slightly relieving the throats of the inserts with a countersink, and then using the inserts as centers for the final turning.
After using the first two for a while, I wanted to try some other designs. So far, I have tried variations including the following features:
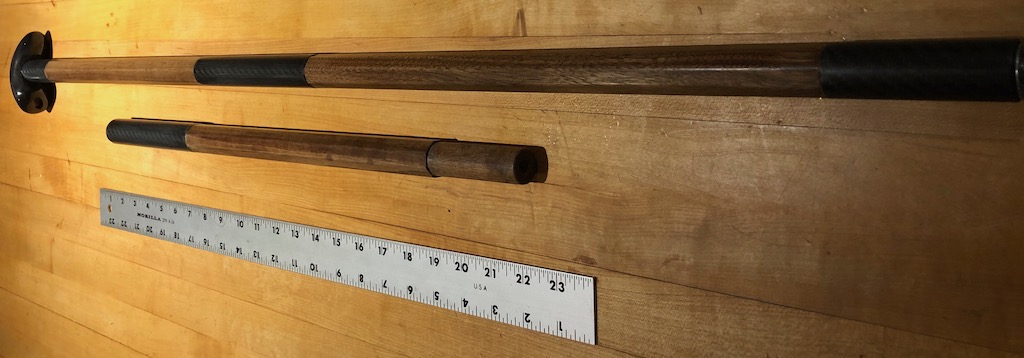
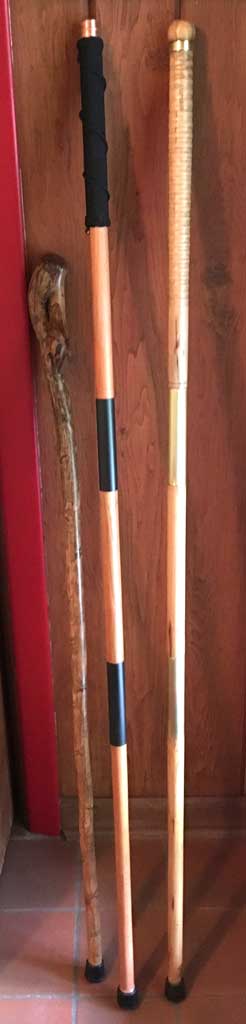
The following stick uses copper tubing, and full-length threaded stainless stell rod. The wood is oak, maple, and cherry. It is very heavy.
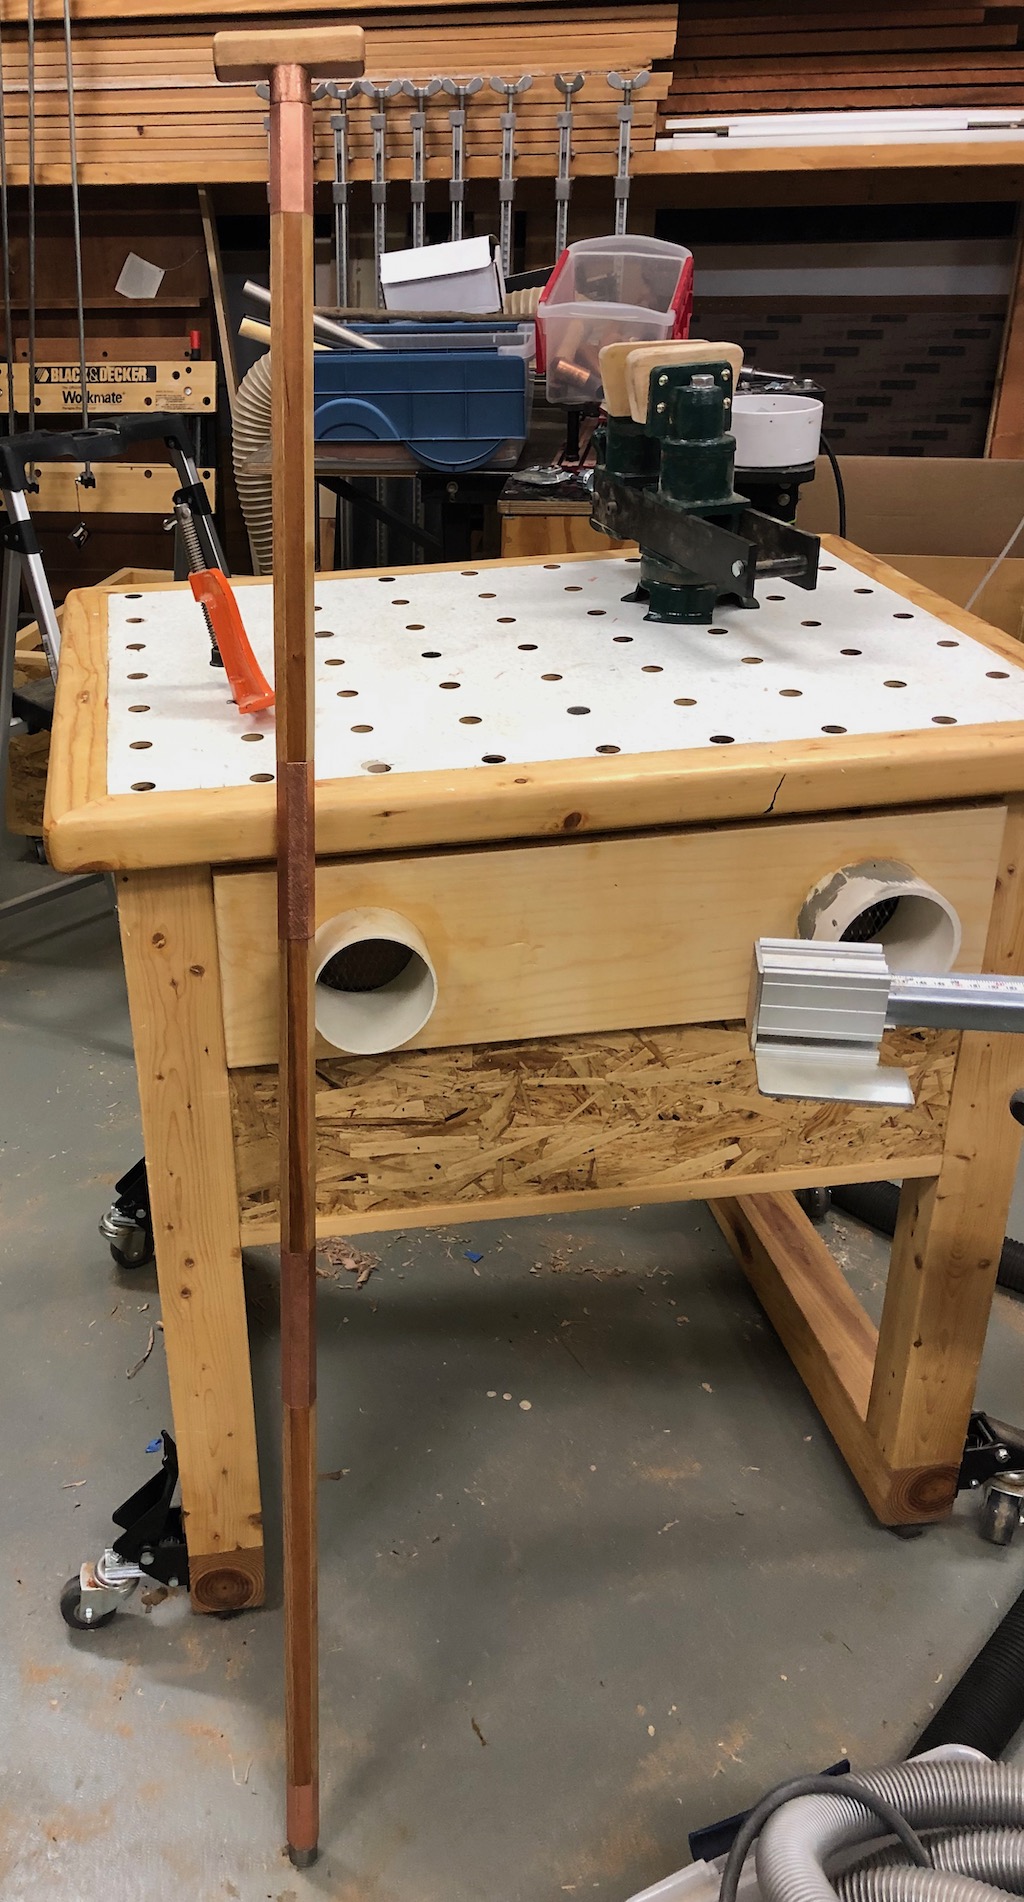
The second image shows some details. What does not show is the threaded rod through the middle section, and the two connector bolts attached to it. Threaded joints that are not intended to unthread easily are secured by a combination of epoxy glue and cylindrical lock-nuts. The latter extend down into the ends of the shafts, for additional strength. The copper pieces on this stick are hammered, to create a patina that I hope will hide the scratches and dents that inevitably will come with usage and soft metal like copper.
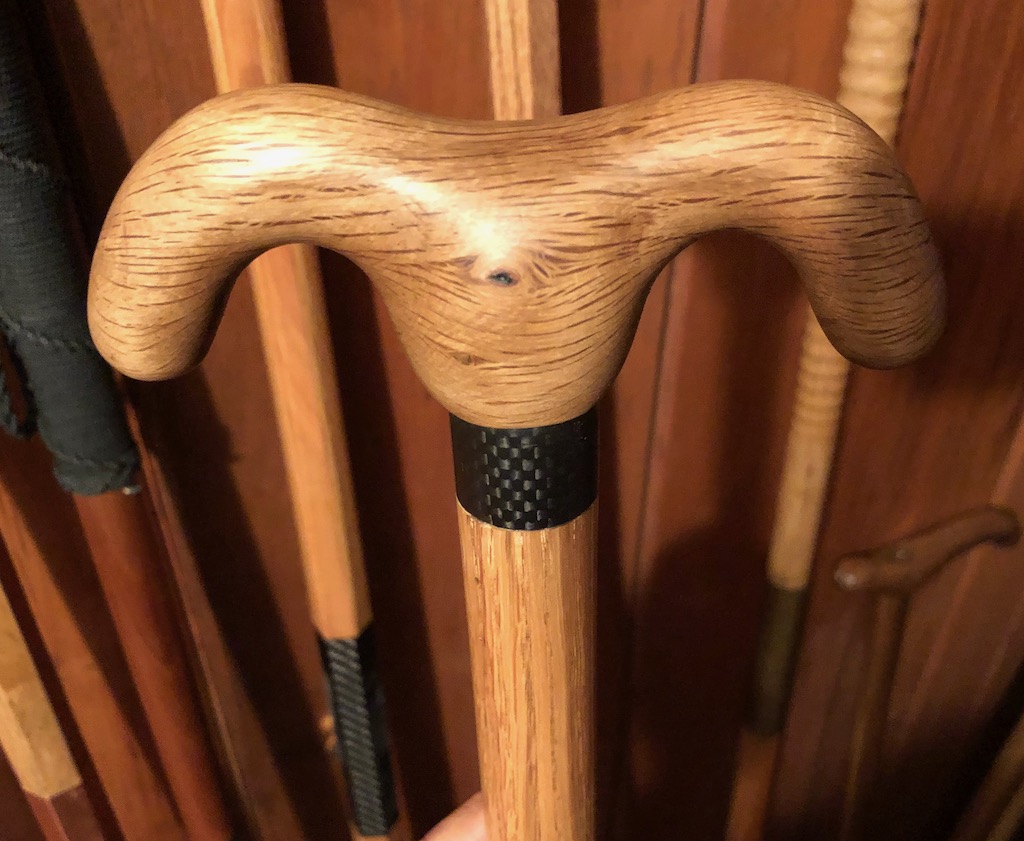
I made several variants of this hexagonal concept, including the one shown below, which has carbon fiber composite tubing. The wood is red oak, and the finial is carved from Southern Live Oak. In this case, the goal was to reduce weight, by using the lighter tubing, which also has a slightly smaller diameter than the copper. Also to save weight, there is no rod in the center section -- just glued-in threaded inserts.

I subsequently experimented with some other variations, including some that taper from hexagonal to round shape at the top and bottom, in various woods.
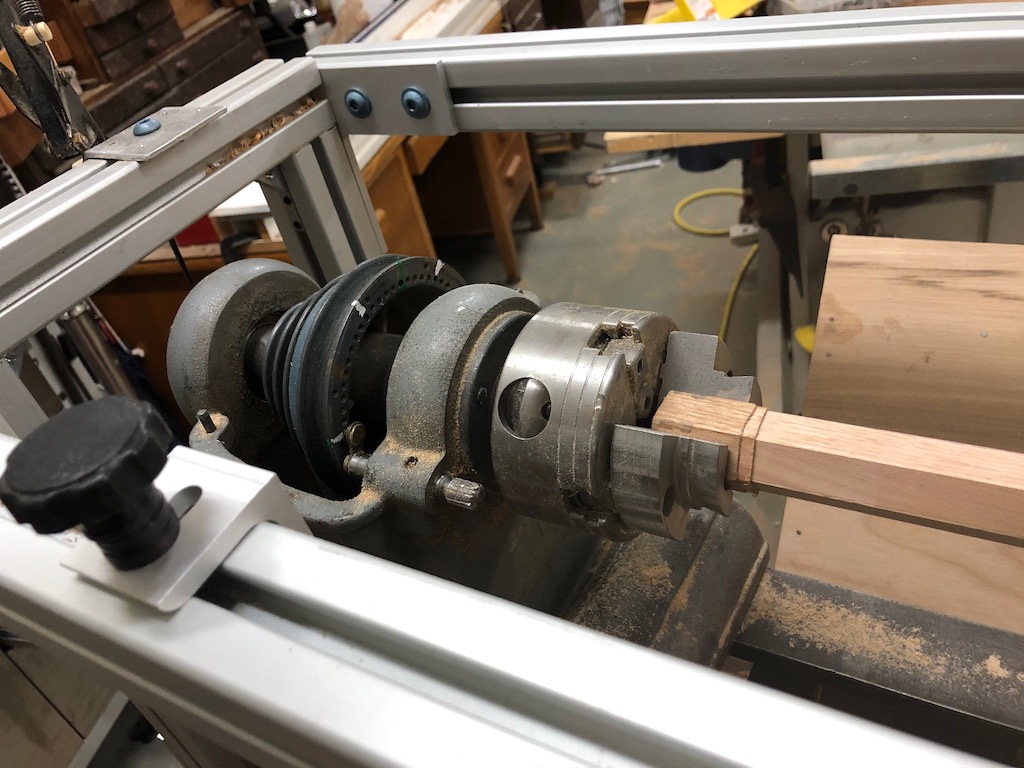
Shaping the hexagonal sections was a bit tricky. I found that my hand planing was not precise enough, but the Delta 1460 has an indexing ring in the headstock
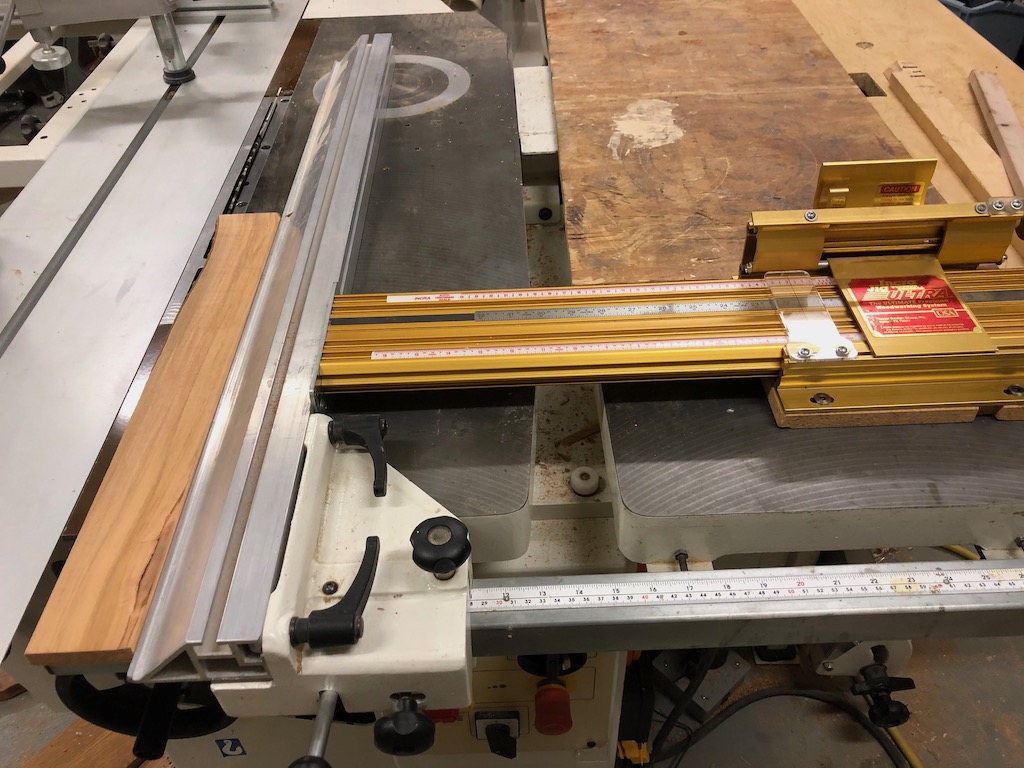
This gave me the idea of building a router sled for the lathe, shown below.
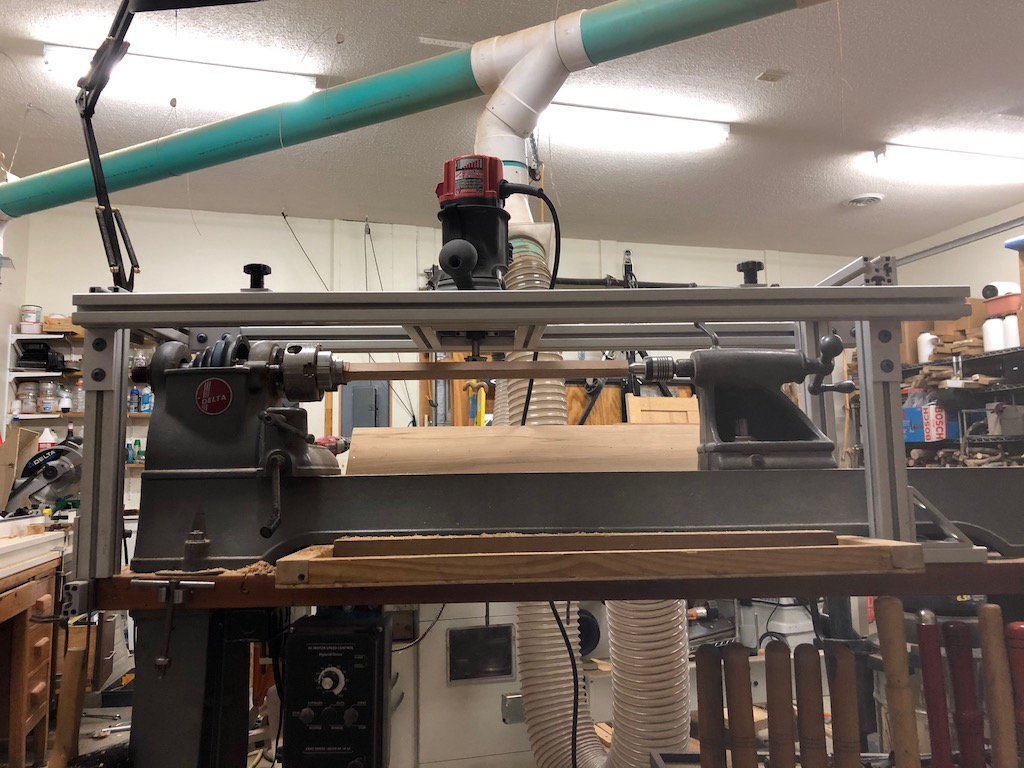
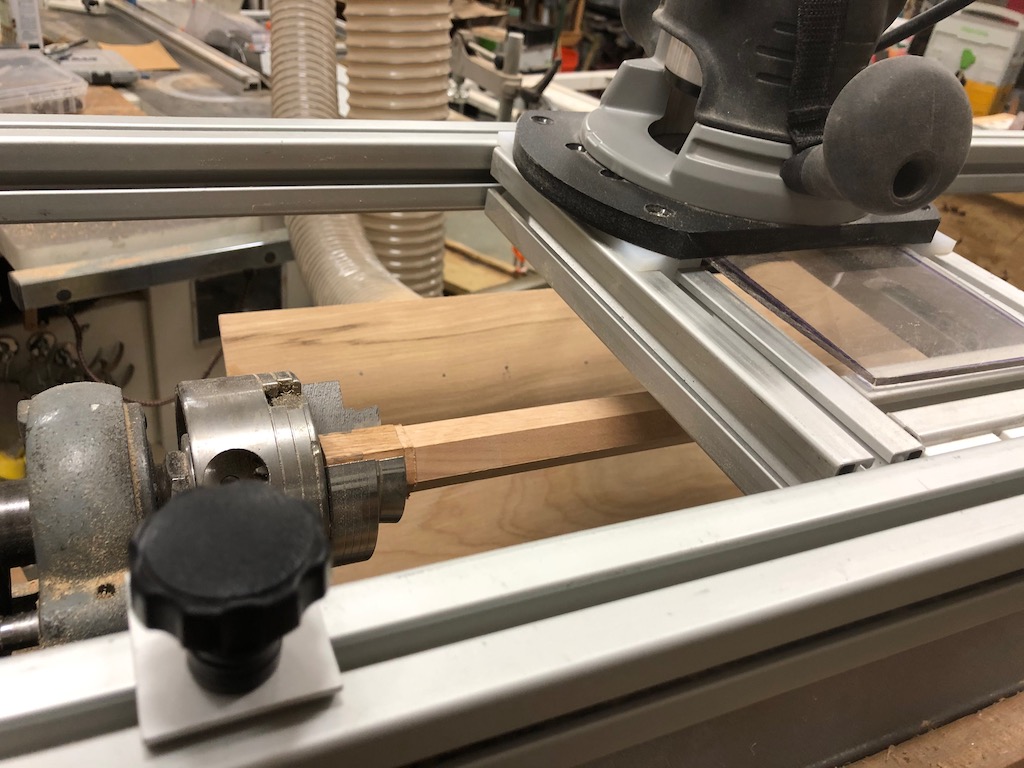
The jig was made using "ultra-lite" 40mm aluminum extrusion and connecting hardware from 80/20 Inc.. The extrusion pieces cut to length on a chop saw, using a carbide blade. The router has an MLCS collet extension, and a surface planing bit. There is a clear polycarbonate shield on the operator side of the sled. I was reminded (the hard way) to pay vigilant constant attention to re-adjusting the stops on the sled. I forgot to adjust them once, ruined a bit, and left scars on part of my live center.
I found that using just two of the four Nova "spigot" chuck jaws allowed repeatable positioning of the hexagonal blank.
The trickiest part was aligning the rails so that they are not only parallel to the lathe bed, but also so that the router bit is co-planar with the flats of the chucked hexagonal stock. That is, I found that with my chuck the nearest pin stop on the indexing ring of the headstock did not correspond exactly to horizontal. So, I had to lower one rail slightly to compensate. This took quite a bit of trial and error. As a consequence, even though the rail superstructure is easy to remove, and makes conventional turning awkward, I have held off removing it until I am certain I will not be making any more hexagonal spindles soon. A possible alternative might be shimming between the chuck and headstock. Finding the right shim thickness would be another trial-and-error process, but the chuck shim could be left in place.
The dust collector I built for the lathe works pretty well for convential turning, and sanding, which throw the chips and dust downward toward the bed of the lathe. It is not very effective with the router, because the router shoots chips out in a horizontal plane. As a consequence, using the router with this jig is very messy.
After making a few sticks with hexagonal tubing joints, I tried using the sled to make an octagonal stick, with round tubing for joints.
I recently stumbled on a Web page describing another sturdy-look ng design, the Multi-Function Walking Stick. It uses 3/4-inch threaded copper plumbing fittings to join the sections. I really like some special features of the design, including a way of converting to a 3-legged canvas-seated stool, and an optional storage compartment. The threaded joints themselves look quite strong, but I am not quite comfortable with the shortness of the sections of wood that extend into the copper fittings.
| © T. P. Baker |